Craft Your Own Pool Float With a Yoga Mat and Noodles
Build a floating pool lounger from a yoga mat and foam noodles, complete with headrest, footrest, armrests, and a built-in cup holder.
By Elliot Brooks13 steps
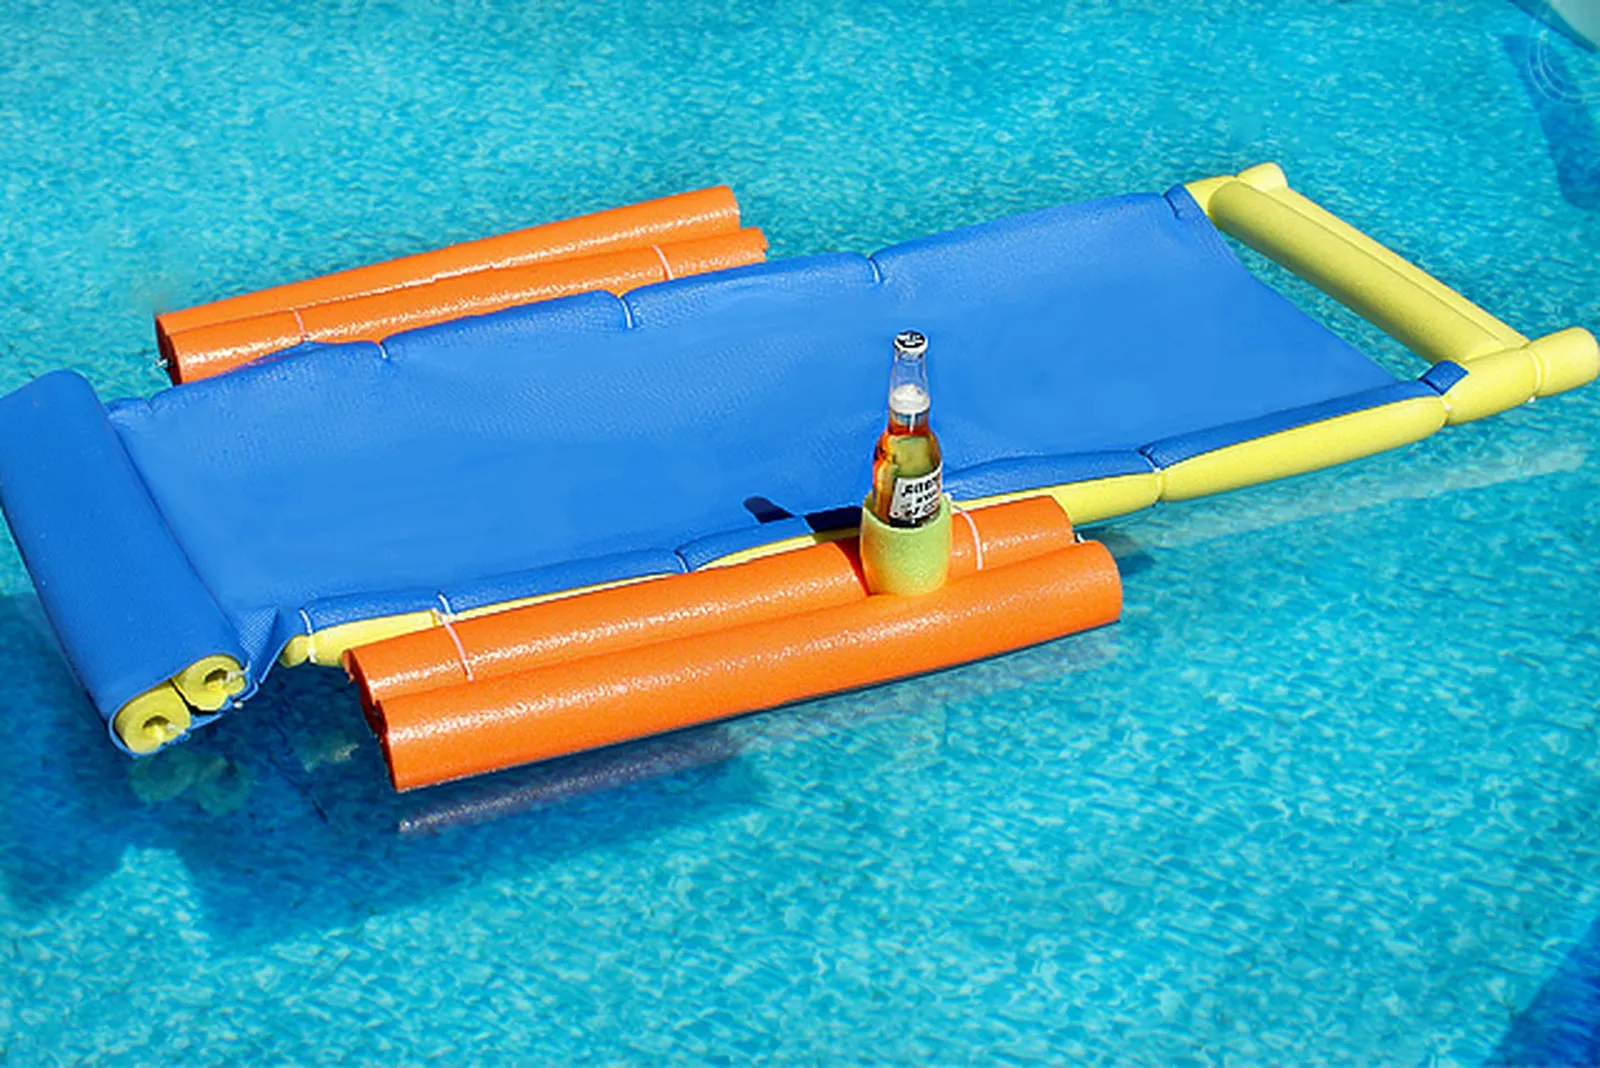
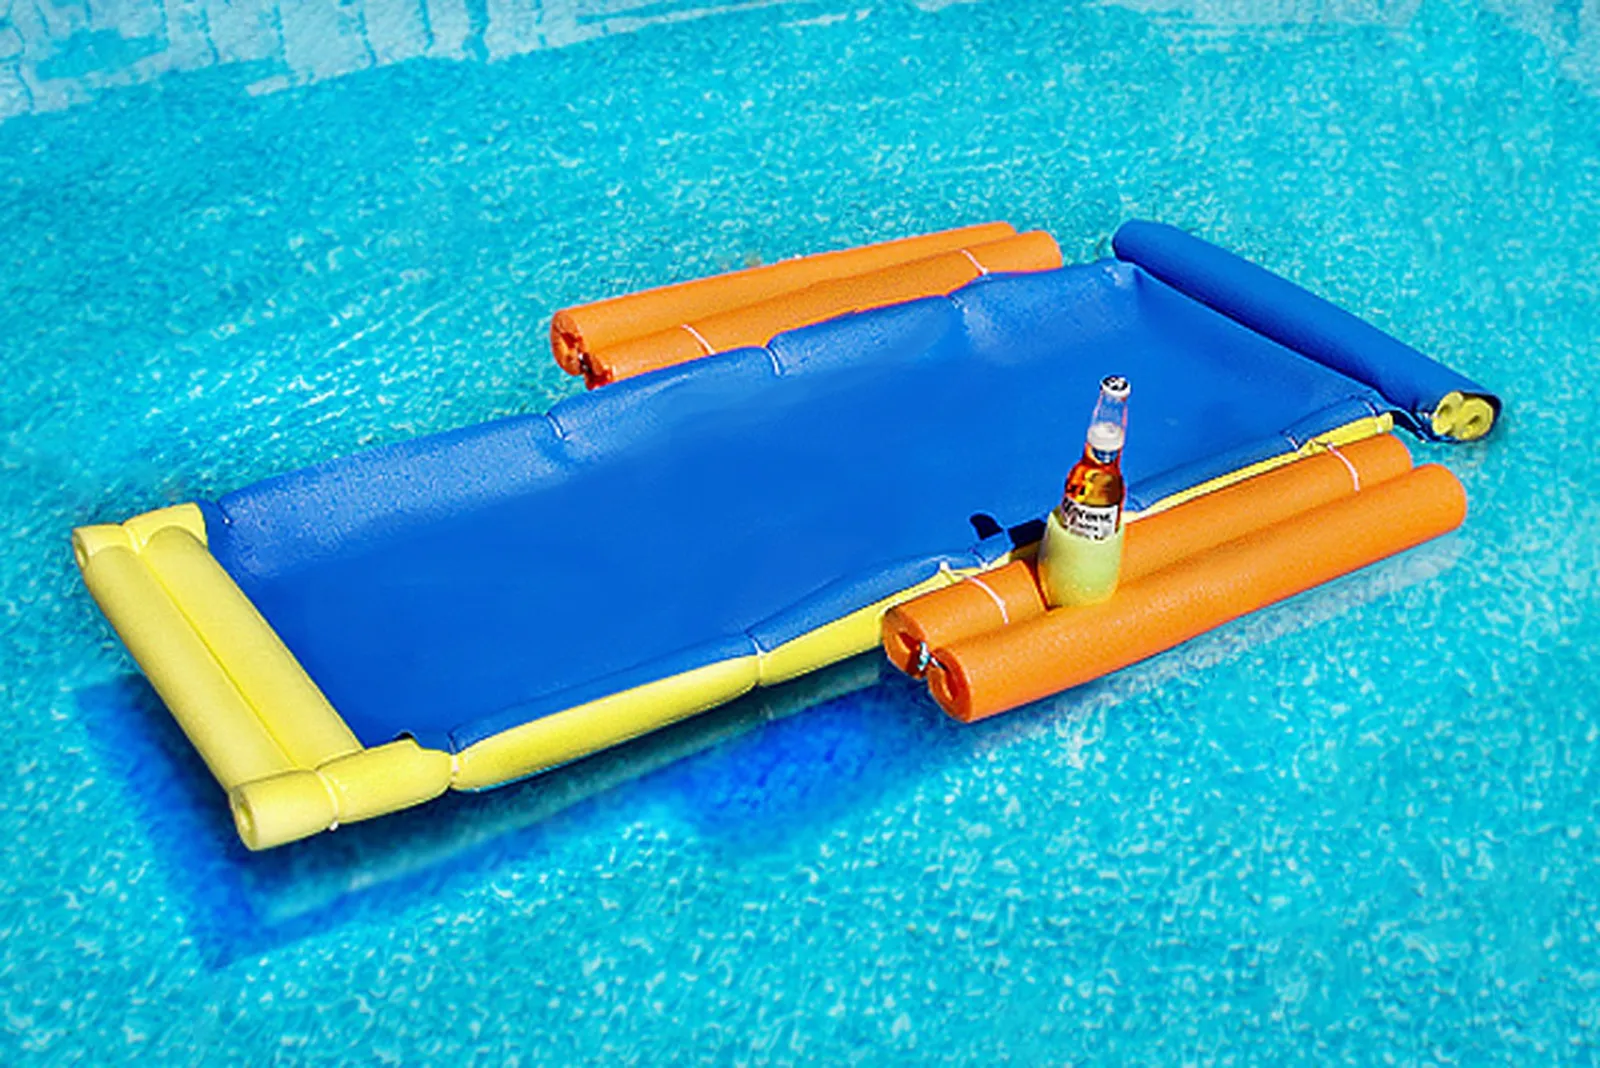
A day in the pool feels better with a floating lounger that lets you bask in the sun, and one that holds your drink is even better. Instead of spending money on an inflatable chair, you can assemble your own from a yoga mat and pool noodles, then settle in with a beverage and enjoy the water at your leisure.
Step 1: Cut Two Noodles for a Head Rest
Unroll the yoga mat and measure its width. With the box-cutter, slice one pool noodle into two lengths matching the mat's width. These pieces form the head rest.
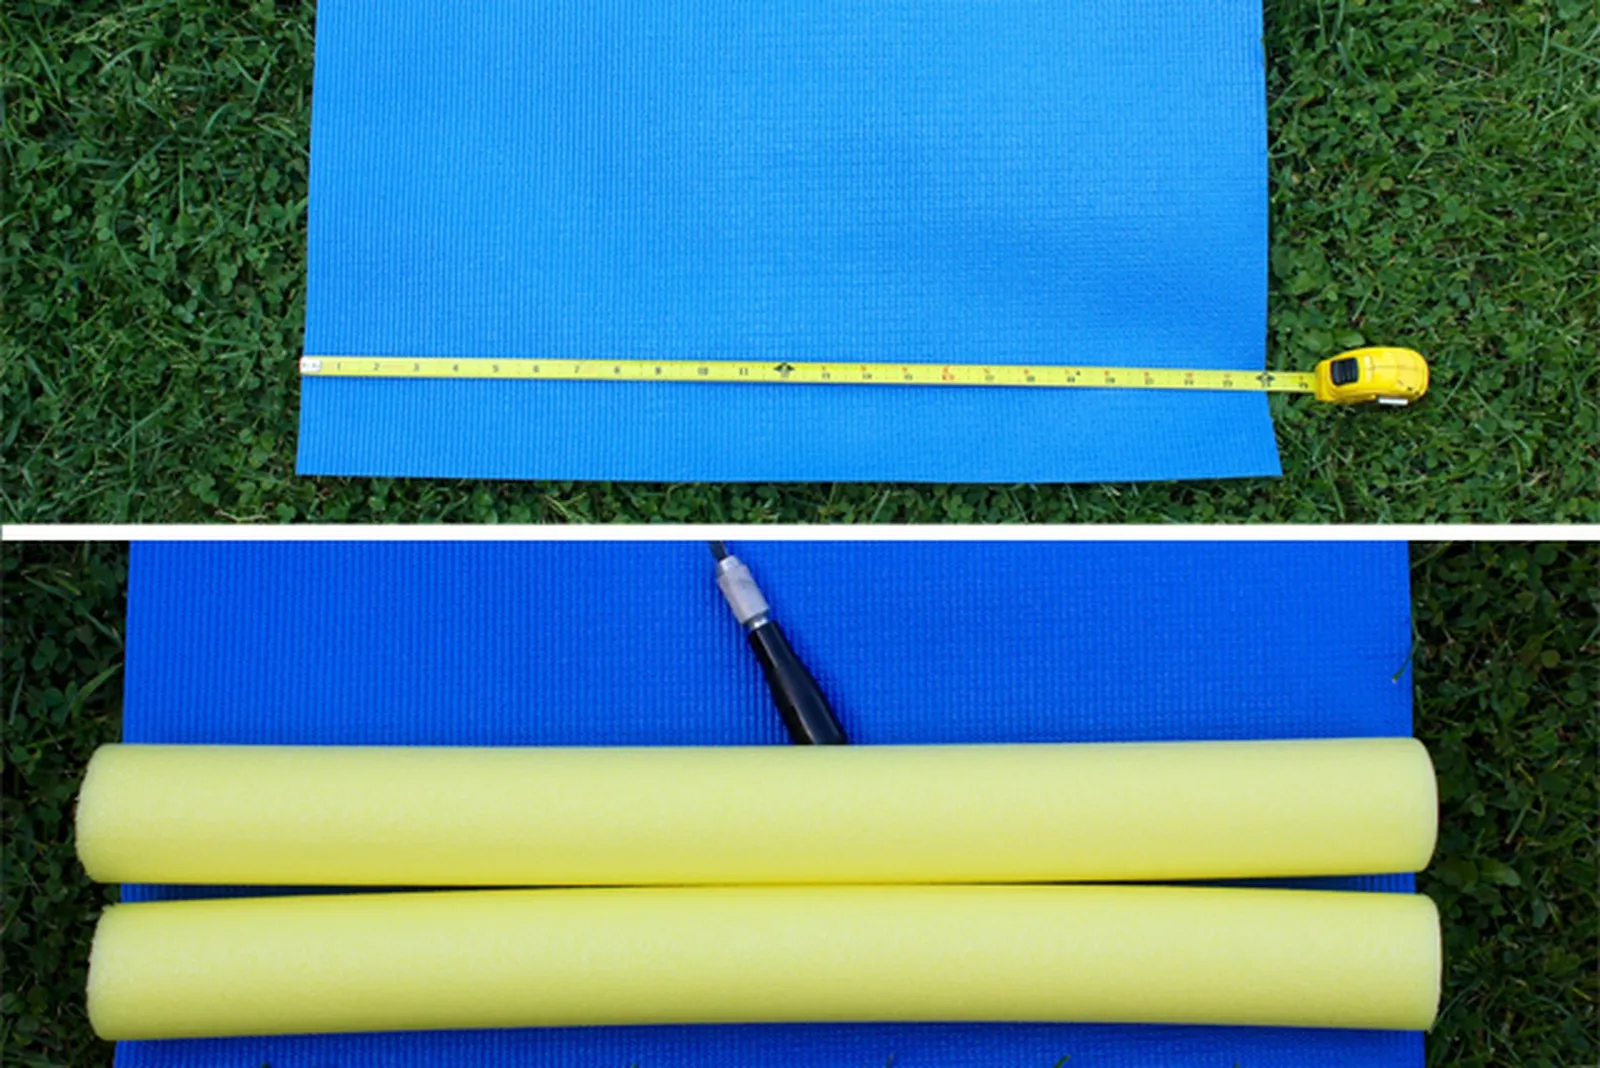
Step 2: Roll the Noodles into the Mat
Set one of the cut noodles at the edge of the mat and roll the mat over it. Lay the second noodle in front of the first and roll the mat again so both noodles end up wrapped inside.
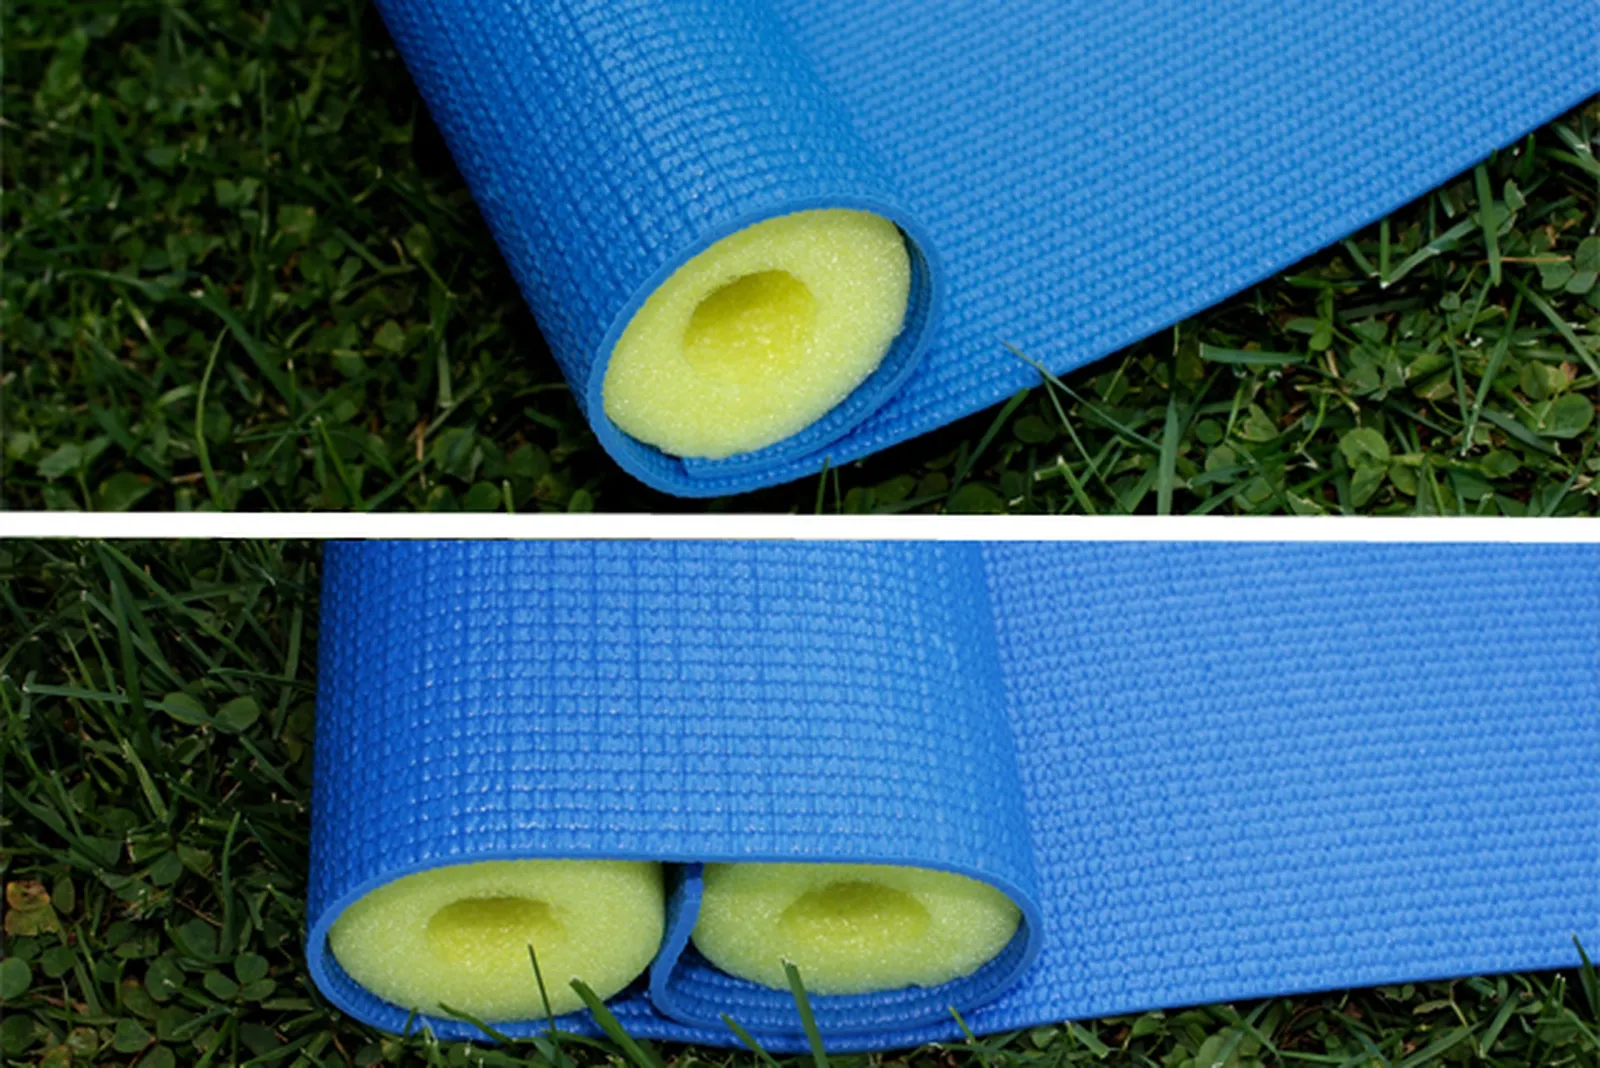
Step 3: Secure the Head Rest with Cable Ties
Insert the box cutter into the hollow core of the first noodle, roughly 2 inches in from the mat's edge. Push it down to make a hole through the noodle and the mat. Feed a cable tie through the openings and pull it tight to hold the noodle and mat together. Do the same at both ends of each noodle so all four noodle ends are fastened to the mat. Once done, snip off the extra cable tie lengths with scissors.
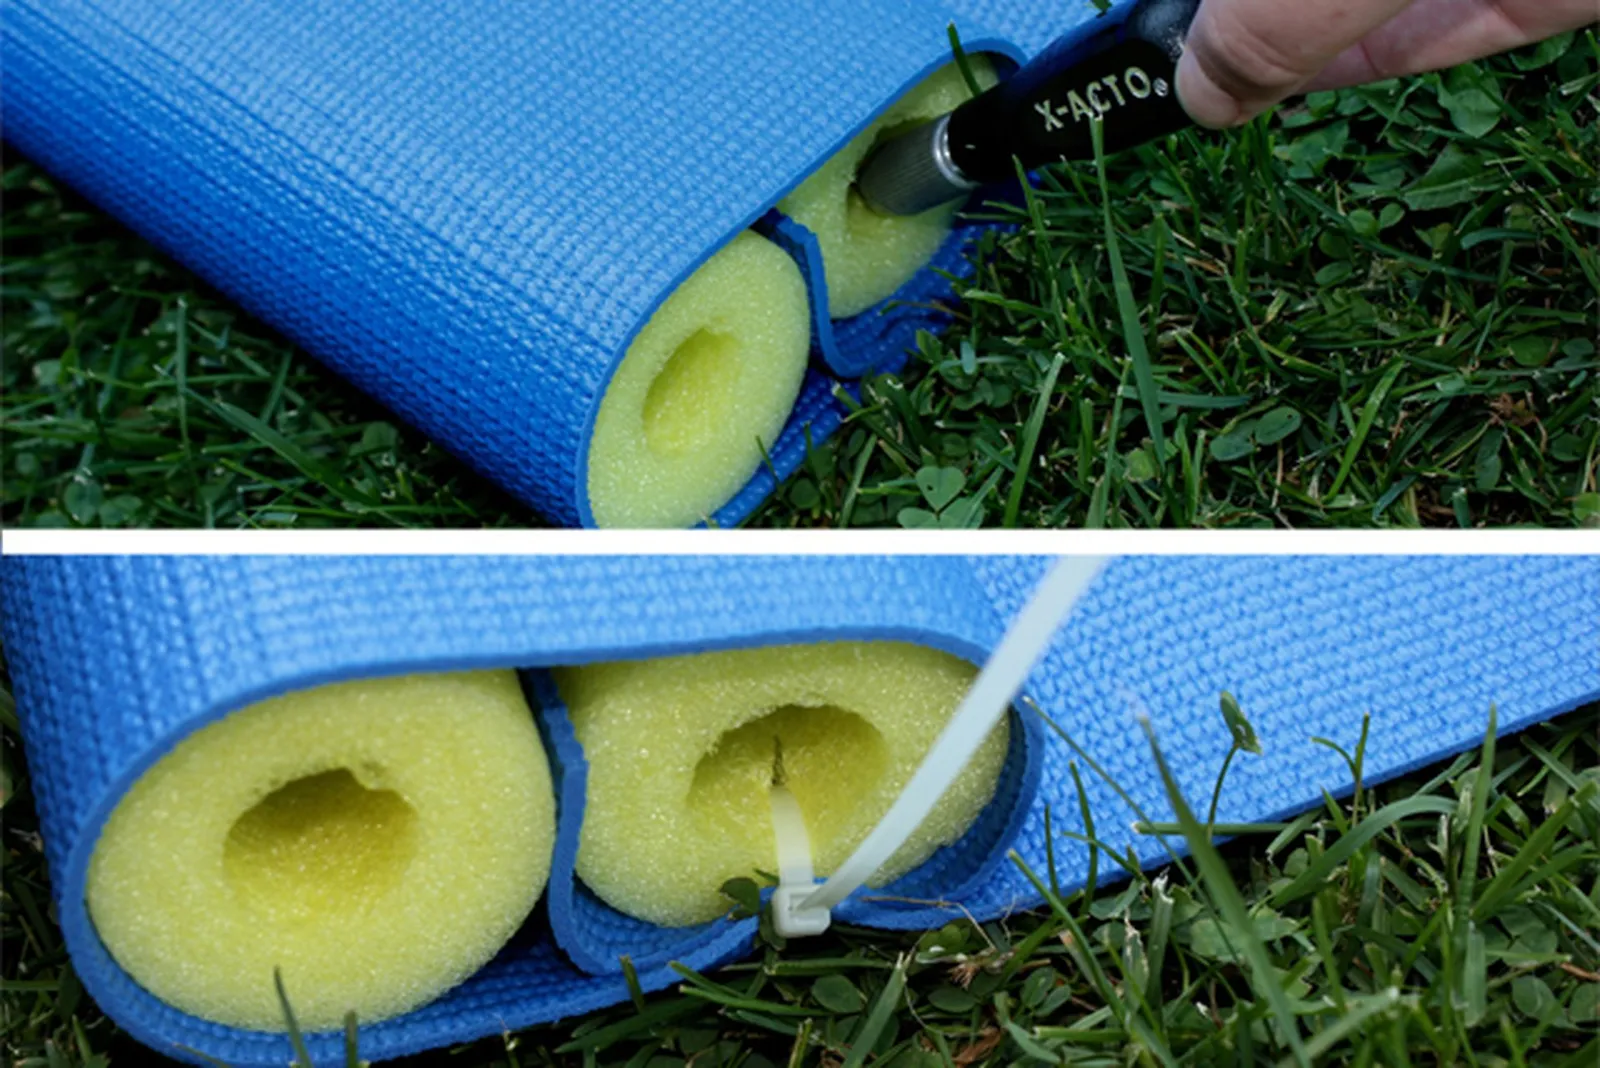
Step 4: Add Noodles for Floatation
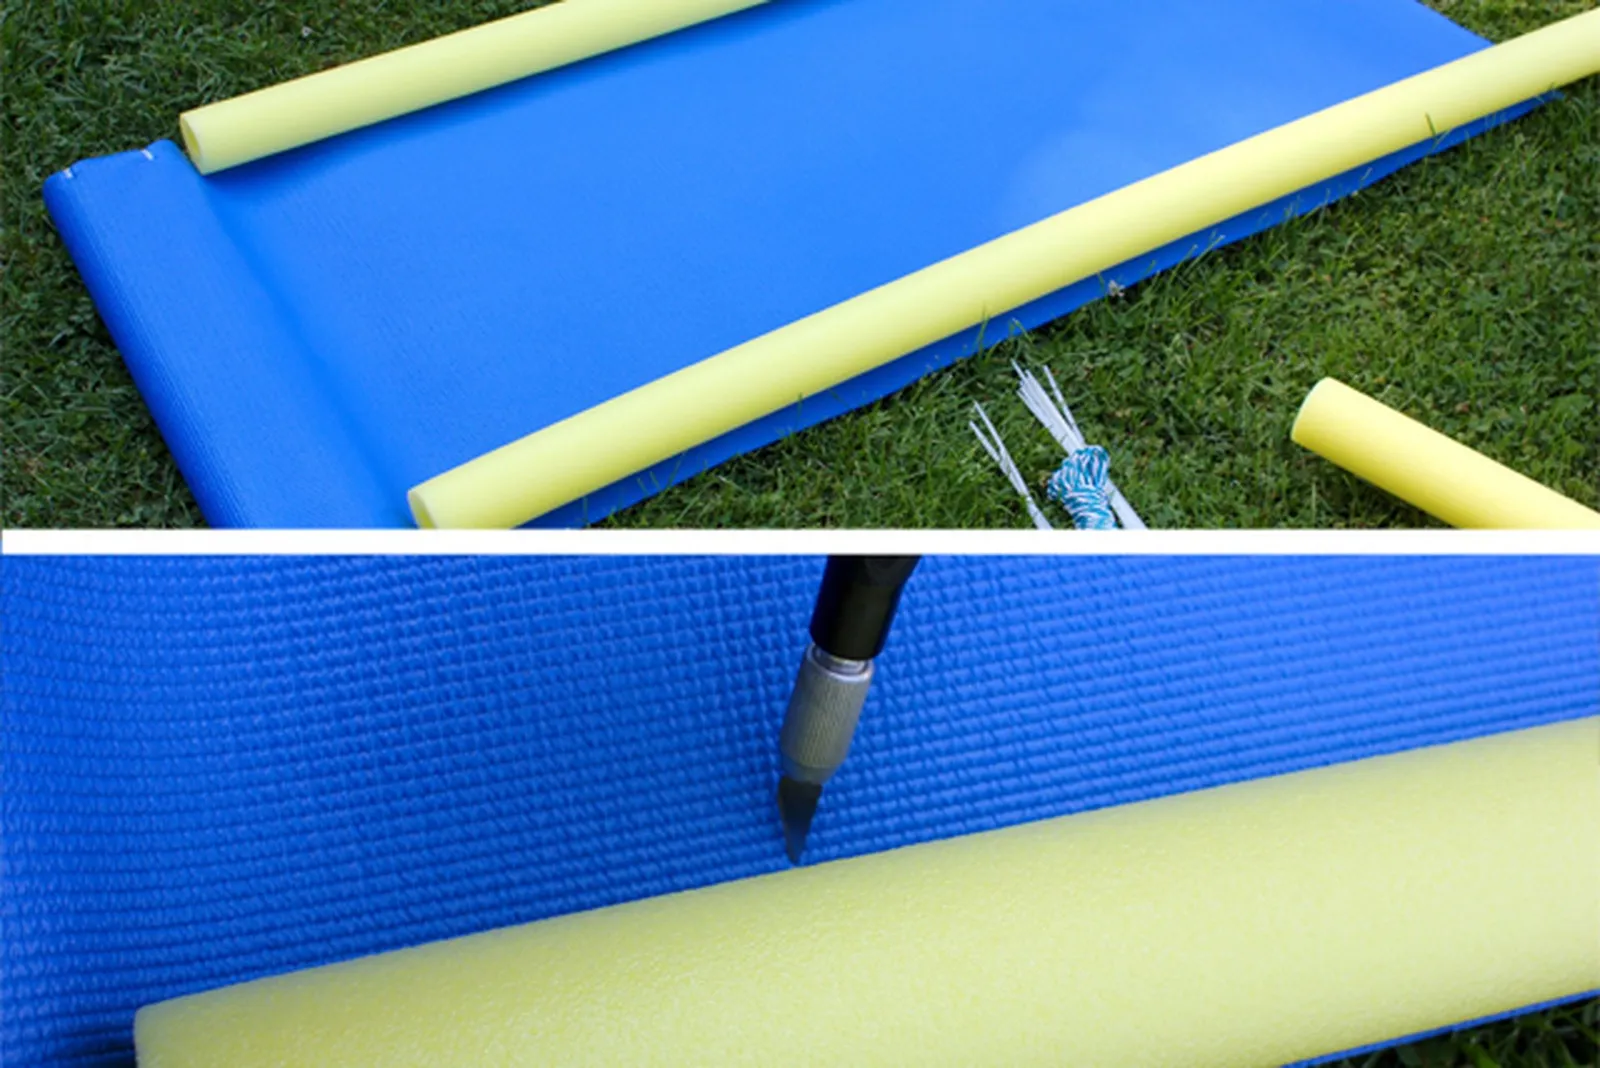
Flip the mat over and place two pool noodles along each of its long sides, positioned just below the head rest. Poke five holes on each side of the mat along the inner edge of the noodle using the box cutter; these will anchor the noodles. Some noodle will extend past the end of the mat—leave it in place, since it will become the foot rest.
Step 5: Secure the Noodles to the Mat
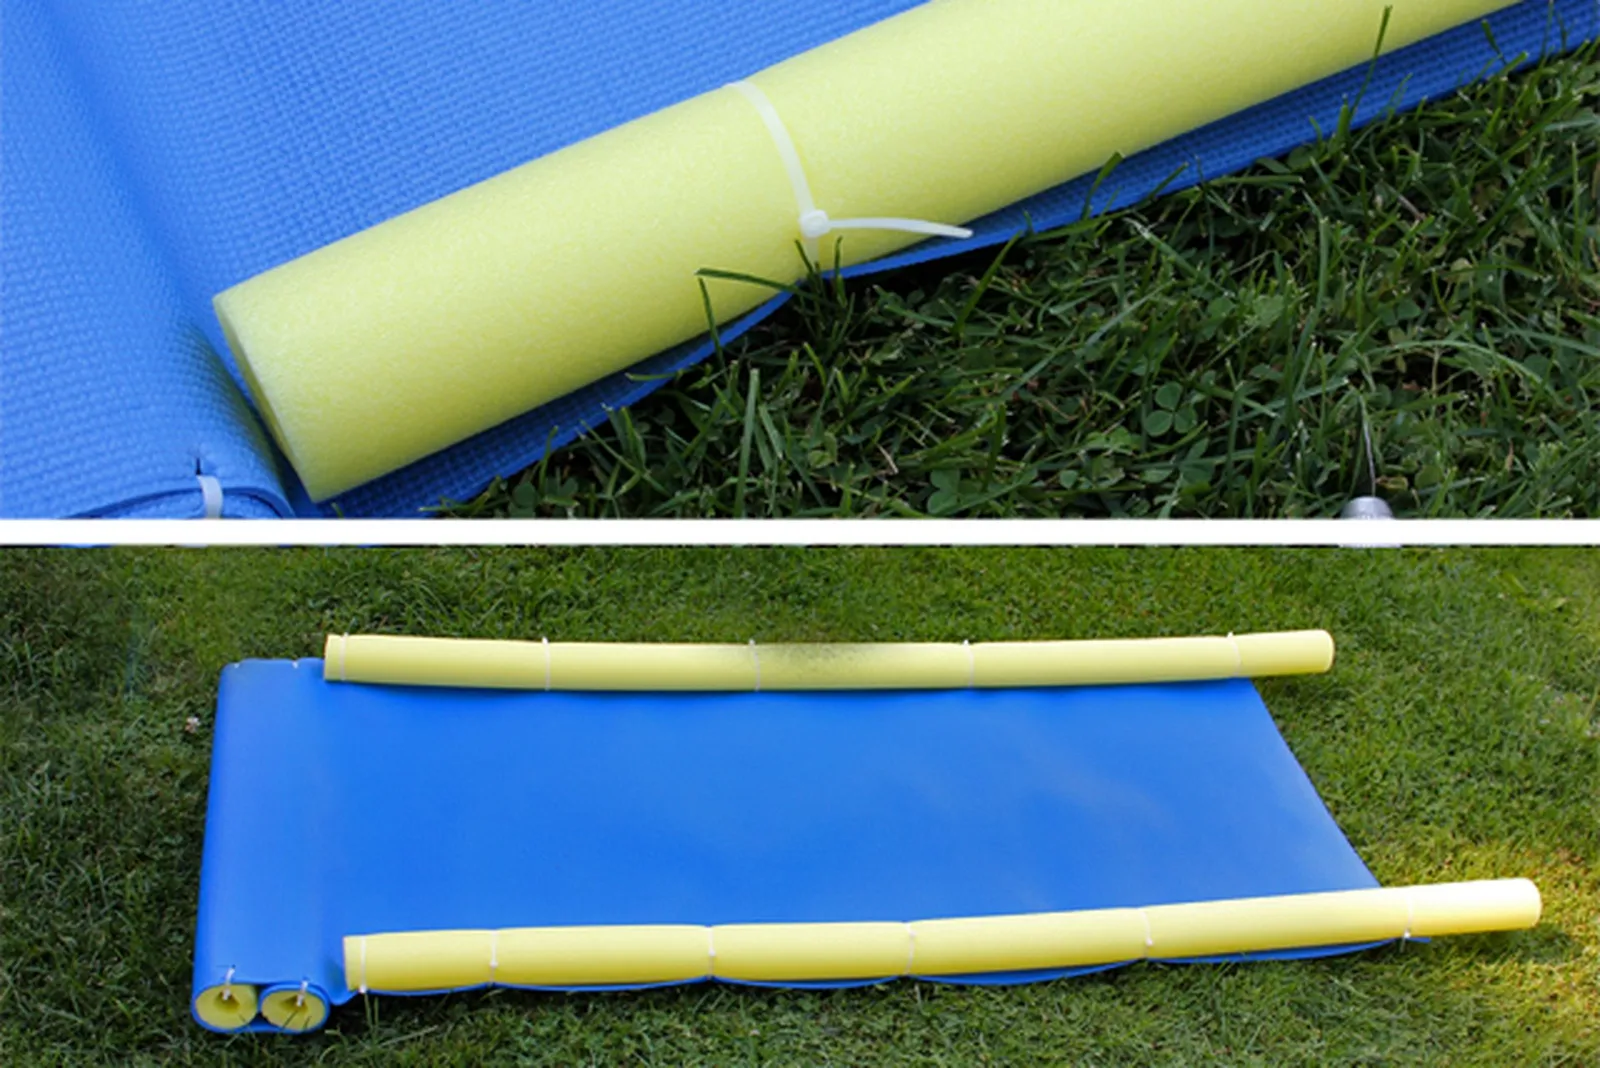
Loop a cable tie around the noodle and through a hole in the mat, then tighten it to fasten the noodle. Continue tying the rest of the noodle to the mat at each hole you made. Do the same for the noodle on the other side. Both noodles should end up firmly tied along the mat's sides. Cut away any excess cable tie after attaching the noodles.
Step 6: Cut Noodles to Make a Foot Rest
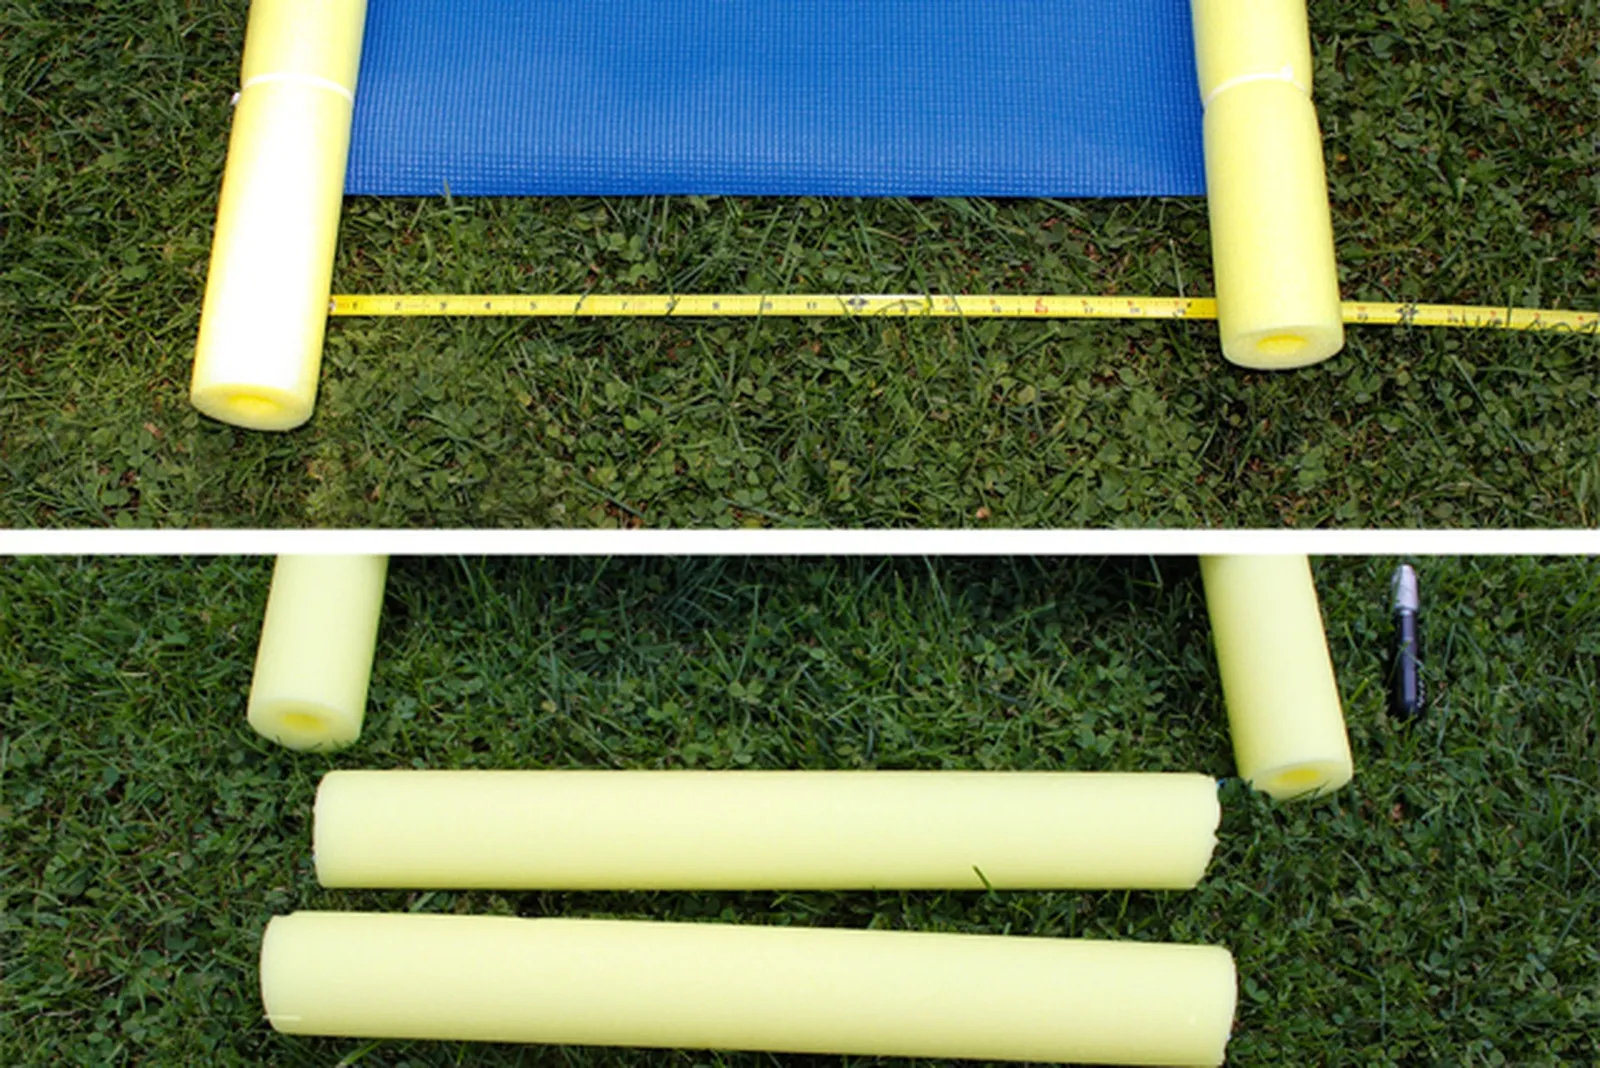
Measure the gap between the two noodle ends protruding past the bottom of the mat and record the figure. Cut two noodle pieces to that length with the box-cutter.
Step 7: Tie the Foot Rest Together
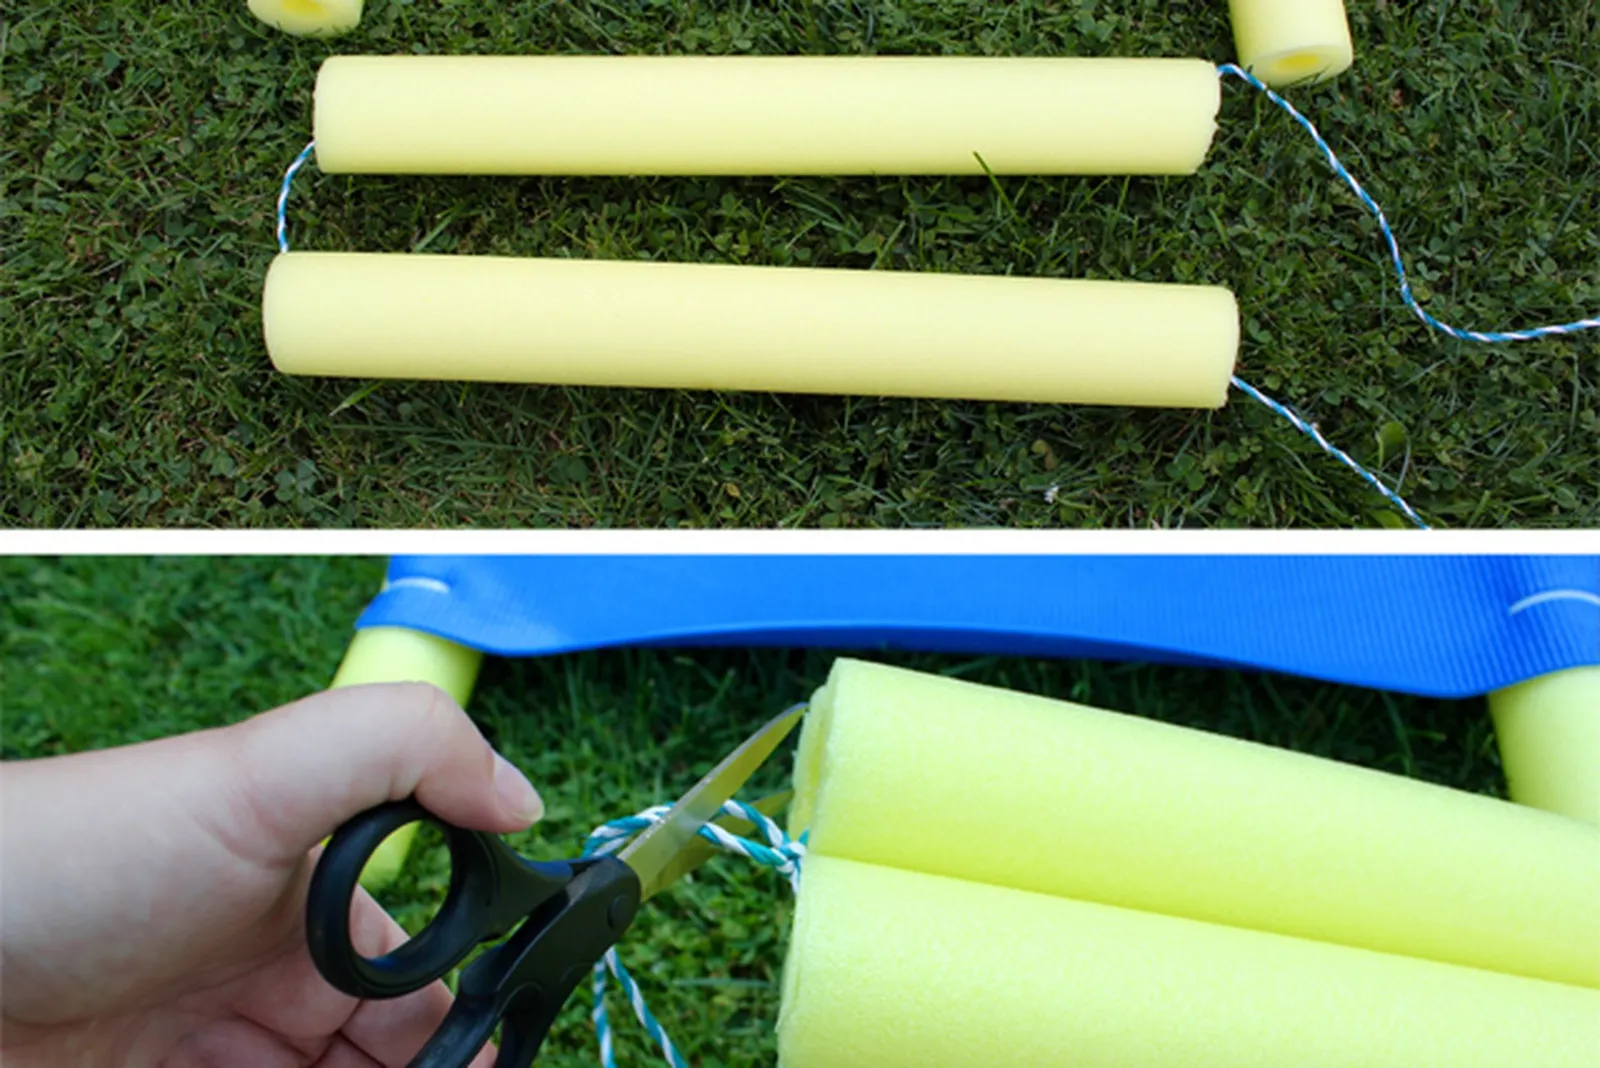
Run one end of the plastic rope through both newly cut noodles. Join them by knotting the rope ends tightly together. Trim the leftover rope with scissors. These two noodle pieces become the foot rest.
Step 8: Attach the Foot Rest
Fasten the foot rest to the noodle ends sticking out past the bottom of the mat: slide a cable tie between the two foot-rest pieces and tighten it around the protruding noodles. Tie both sides of the foot rest this way, then trim the excess cable tie so it won't poke anyone while in use.
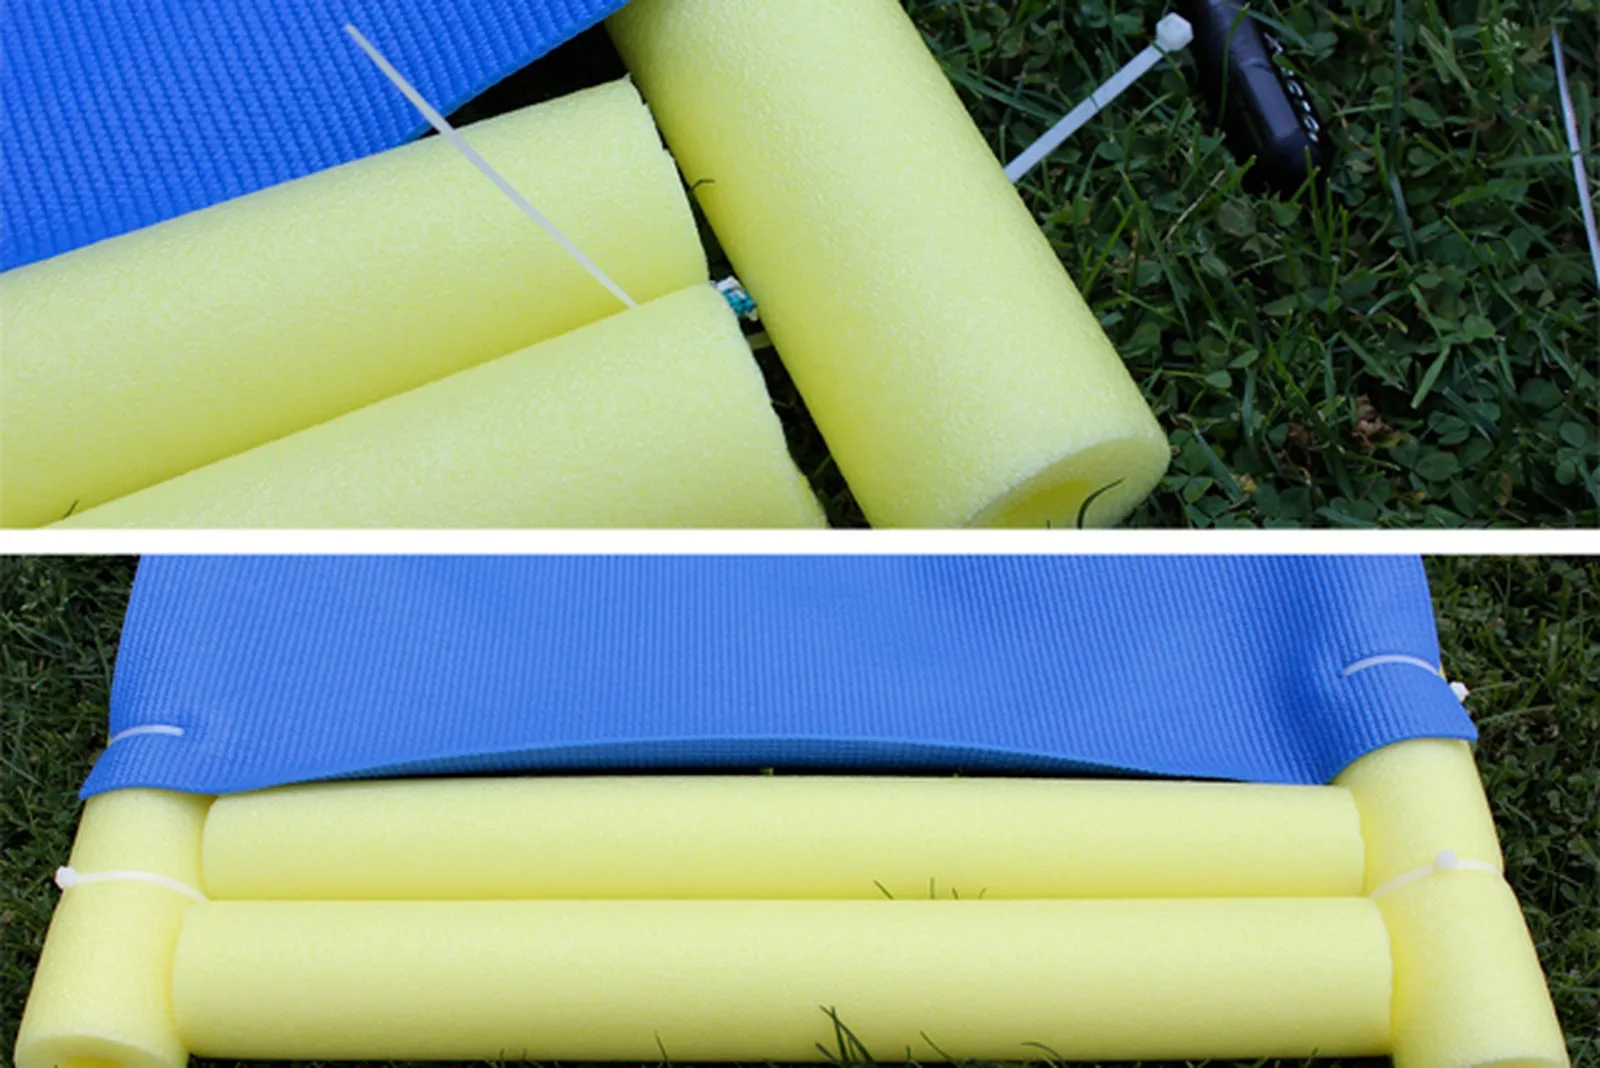
Step 9: Build Arm Rests
Slice two pool noodles in half with the box-cutter to get four pieces. Run plastic rope through two of the pieces and tie them firmly together. Join the remaining two pieces the same way, producing two arm rests. After knotting tightly, cut off the extra plastic rope.
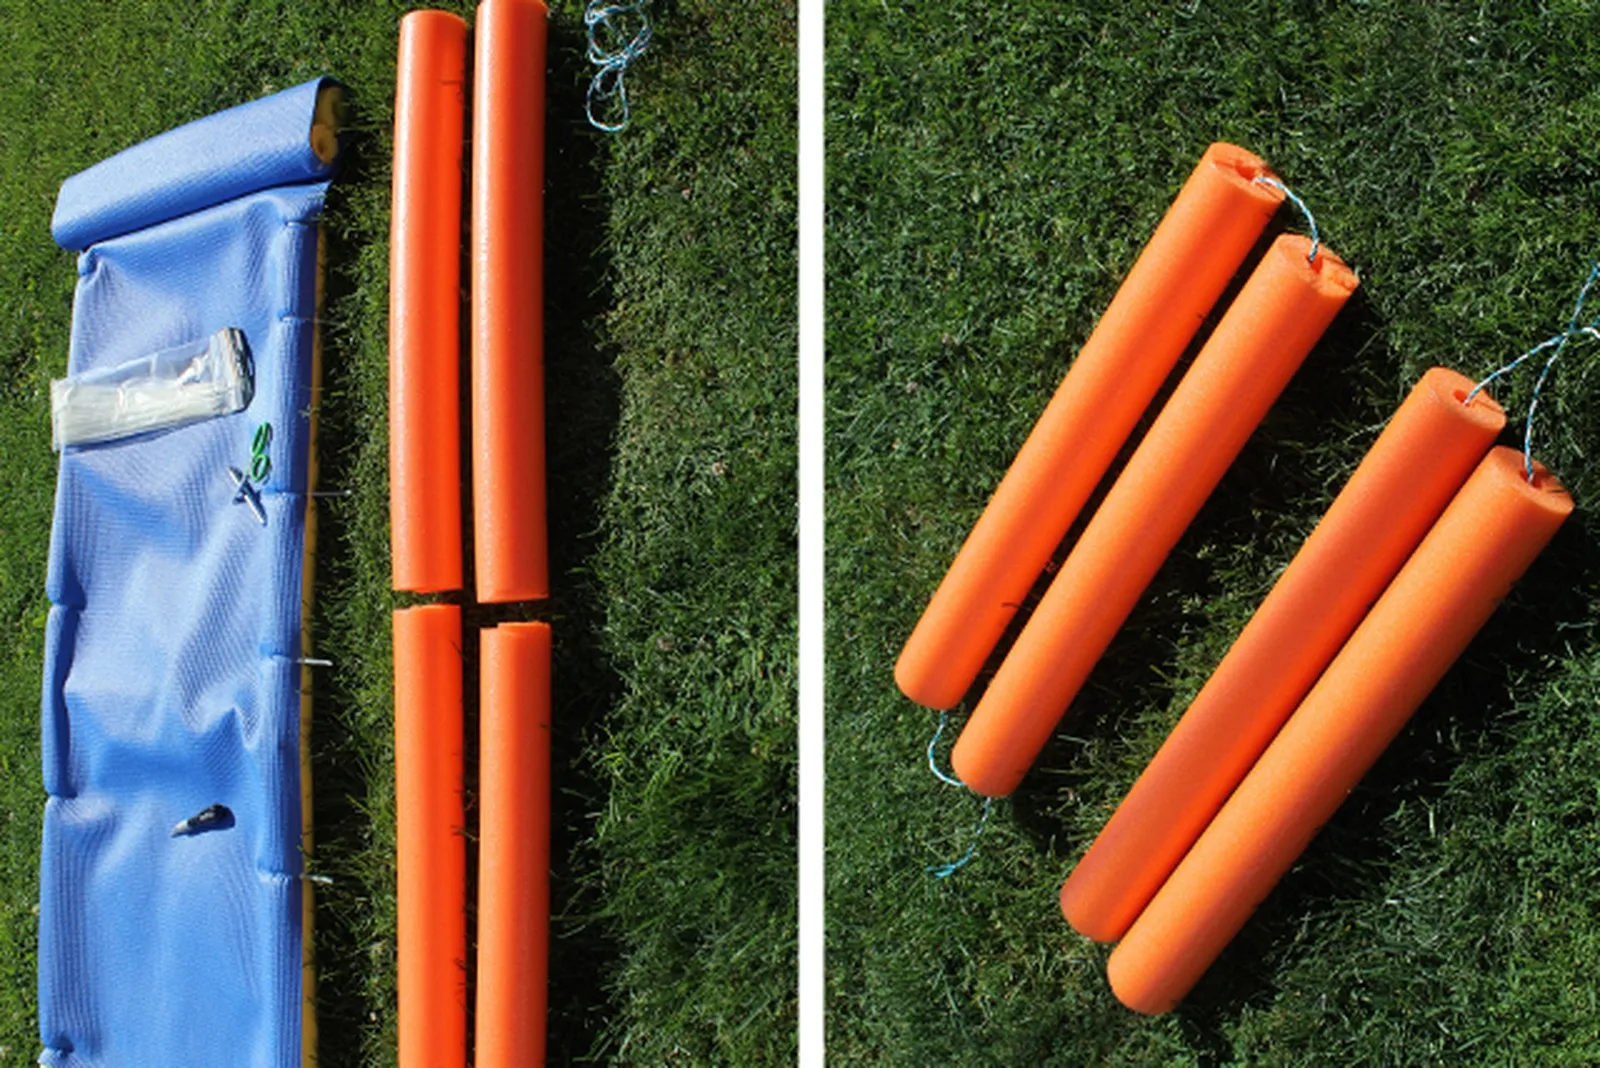
Step 10: Build a Cup Holder
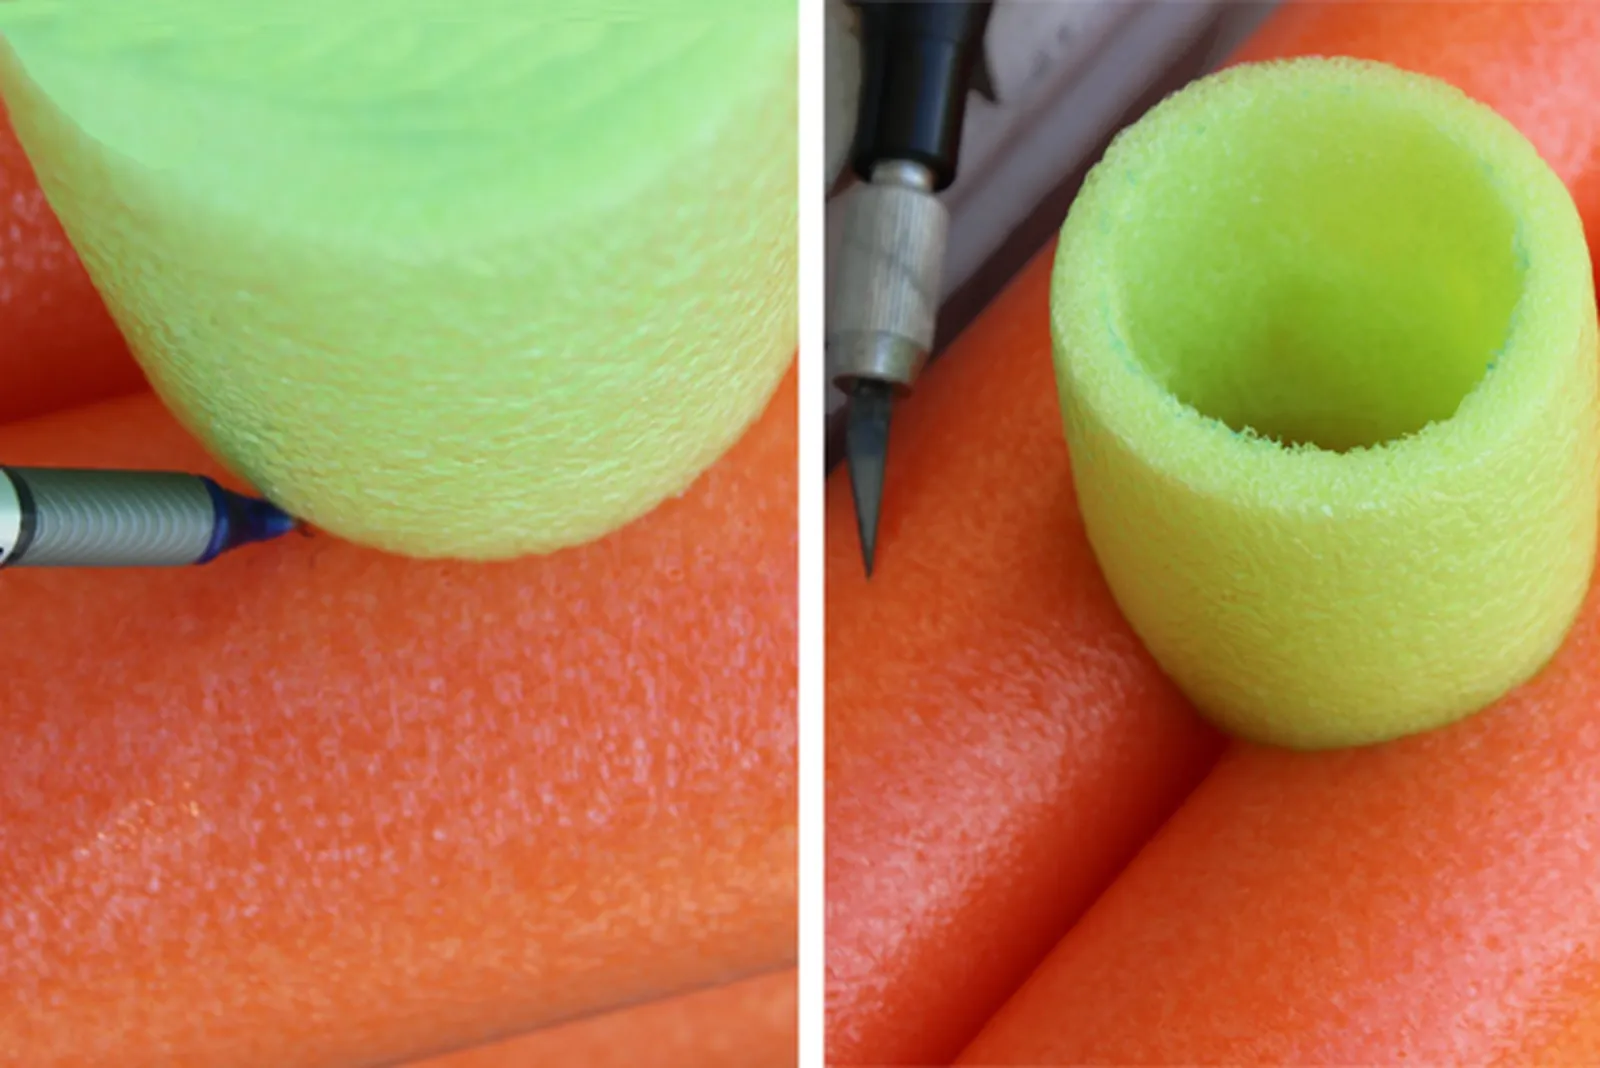
Use the box cutter to cut a 4-inch section of pool noodle. Stand it upright and set your preferred summer drink on top. Trace the bottle's outline onto the noodle with a pen.
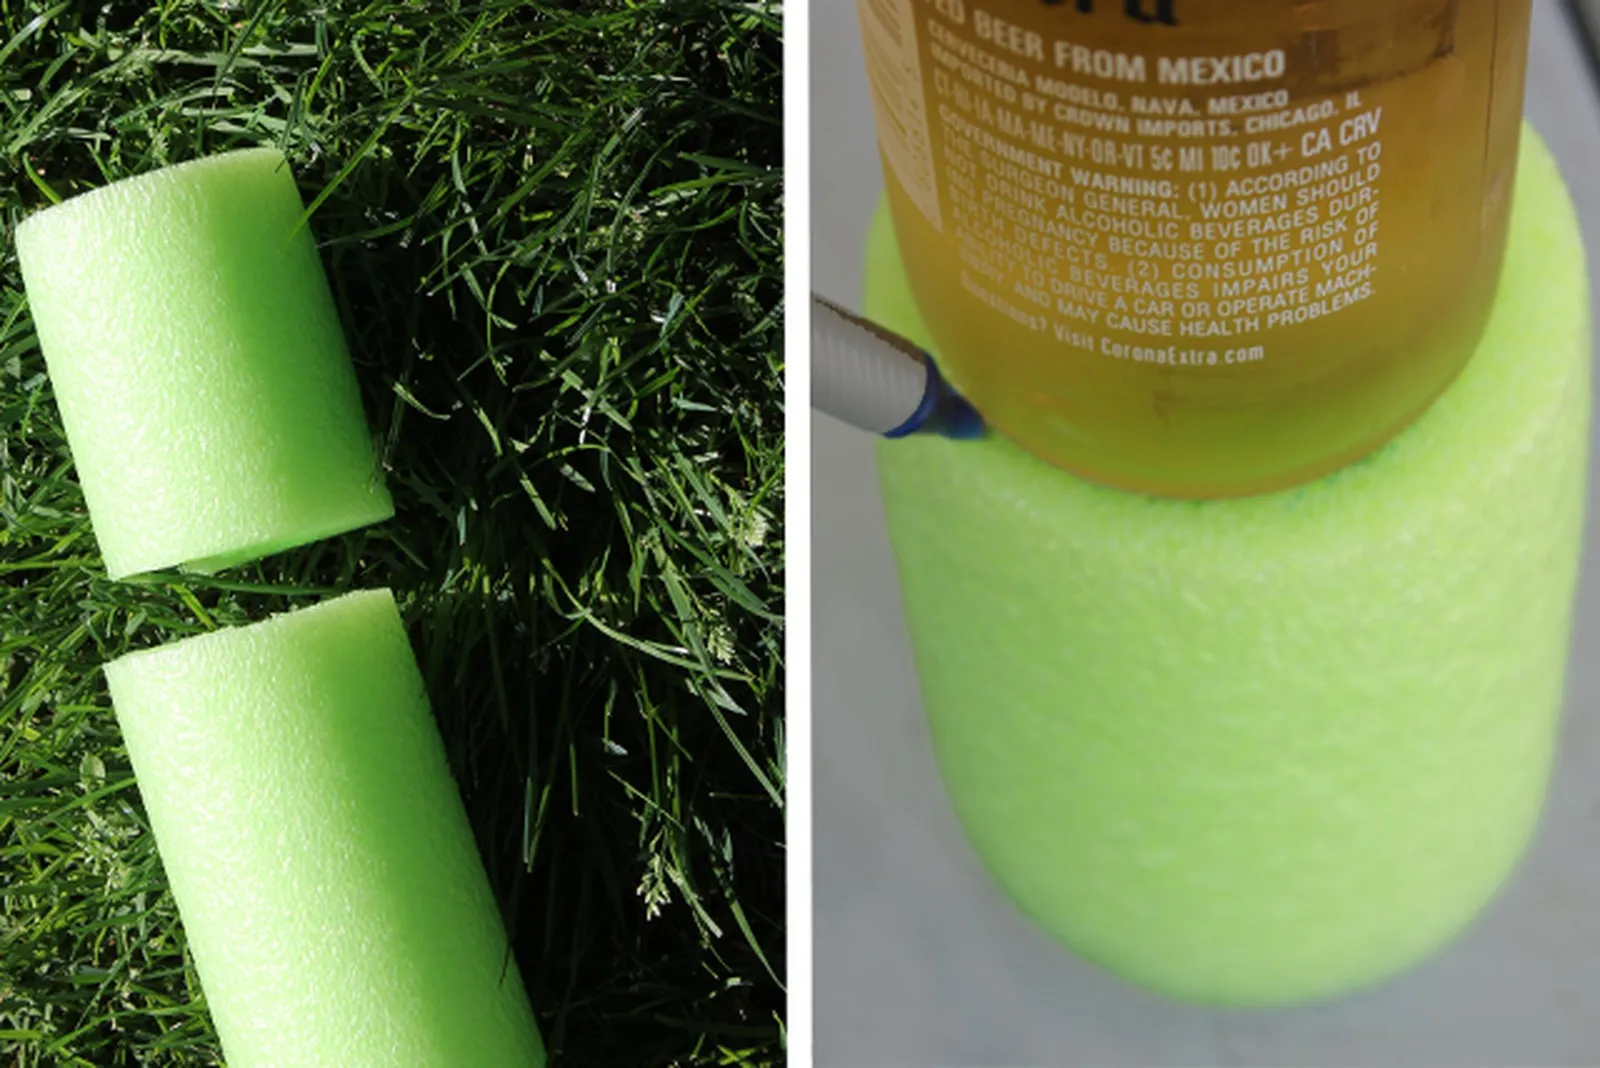
Step 11: Hollow Out the Cup Holder
Following the traced line as a guide, use the box-cutter to remove the center of the noodle. Cut only about three-quarters of the way down the cup holder's height, keeping the bottom intact.
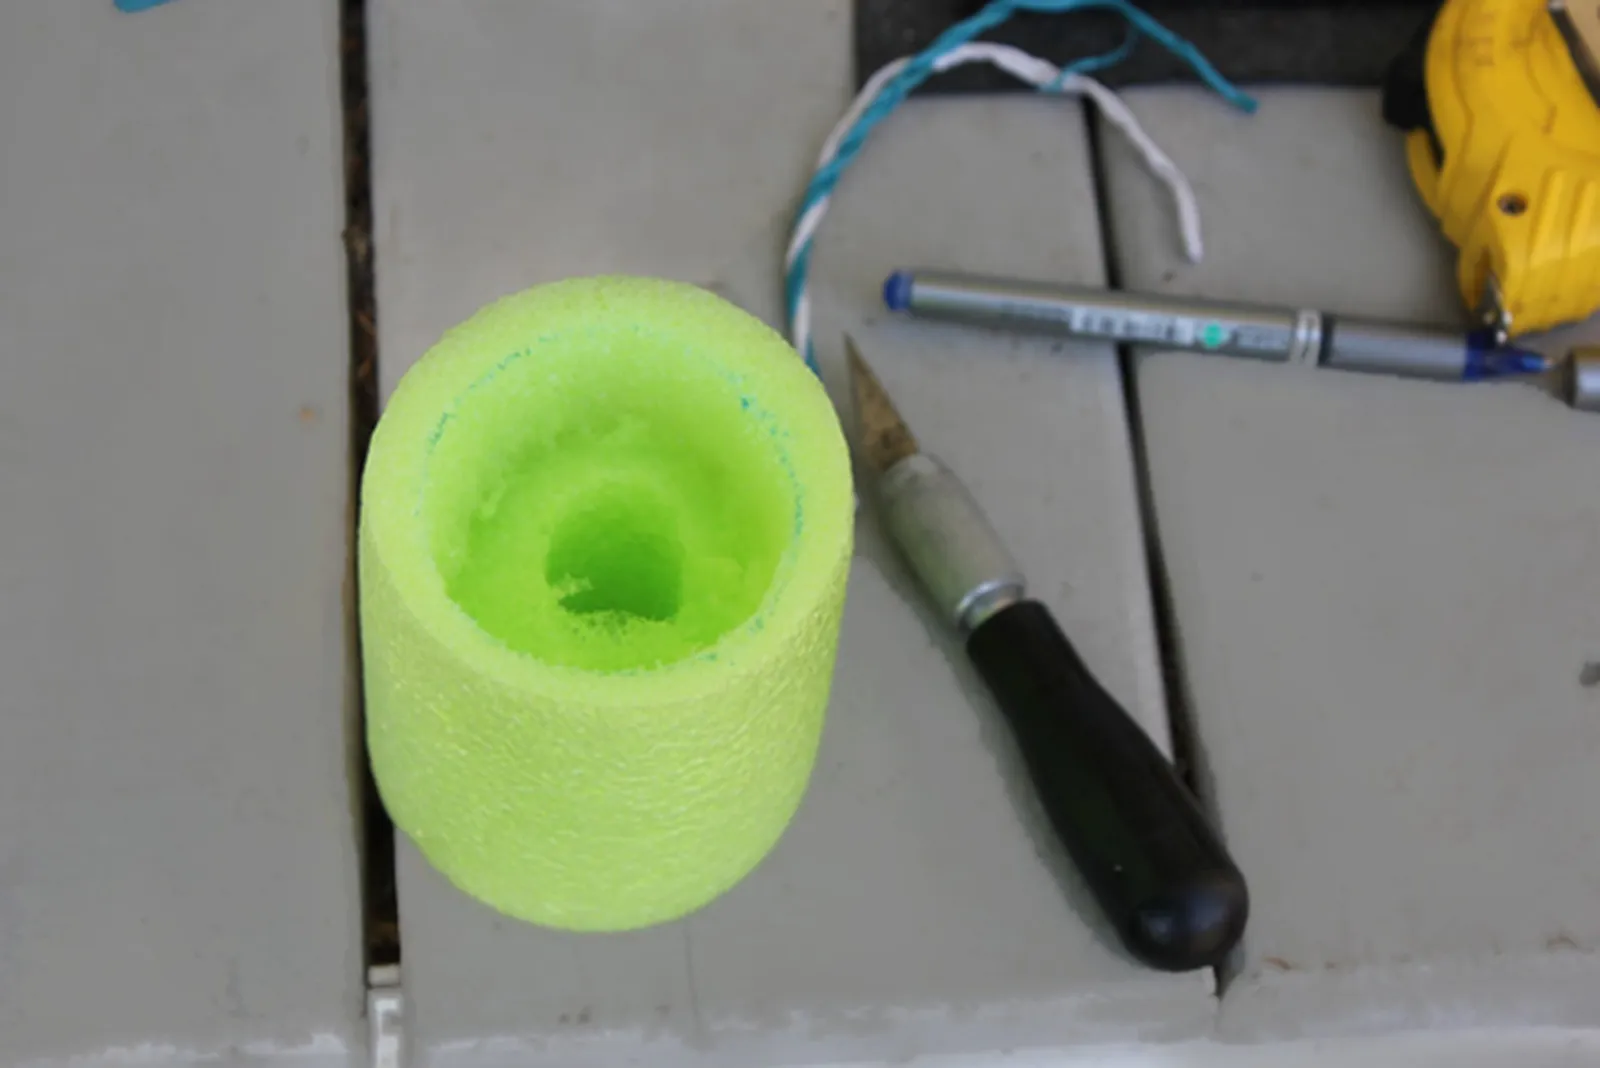
Step 12: Attach the Cup Holder to the Arm Rest
Set the cup holder at the middle of the arm rest, roughly three-quarters of the way down from the head rest, and trace its outline with a pen. Cut out the traced circle on the arm rest with the box-cutter and insert the cup holder. The opening for the cup holder only needs to be about 3 inches deep, and the holder should sit snugly at the center of the arm rest.
Step 13: Attach the Arm Rests to the Chair
Turn the lounger over so its underside faces up. Set an arm rest beside one of the noodles that forms the chair's frame. Slide a cable tie between the arm rest's two noodles and around the noodle fixed to the mat's side. Tighten it near the head rest. Add a second cable tie around the noodle toward the far end of the arm rest. Do the same with the second arm rest on the other side. Since the chair is upside down, mount the arm rest holding the cup holder so the holder faces up once the chair is flipped back over.
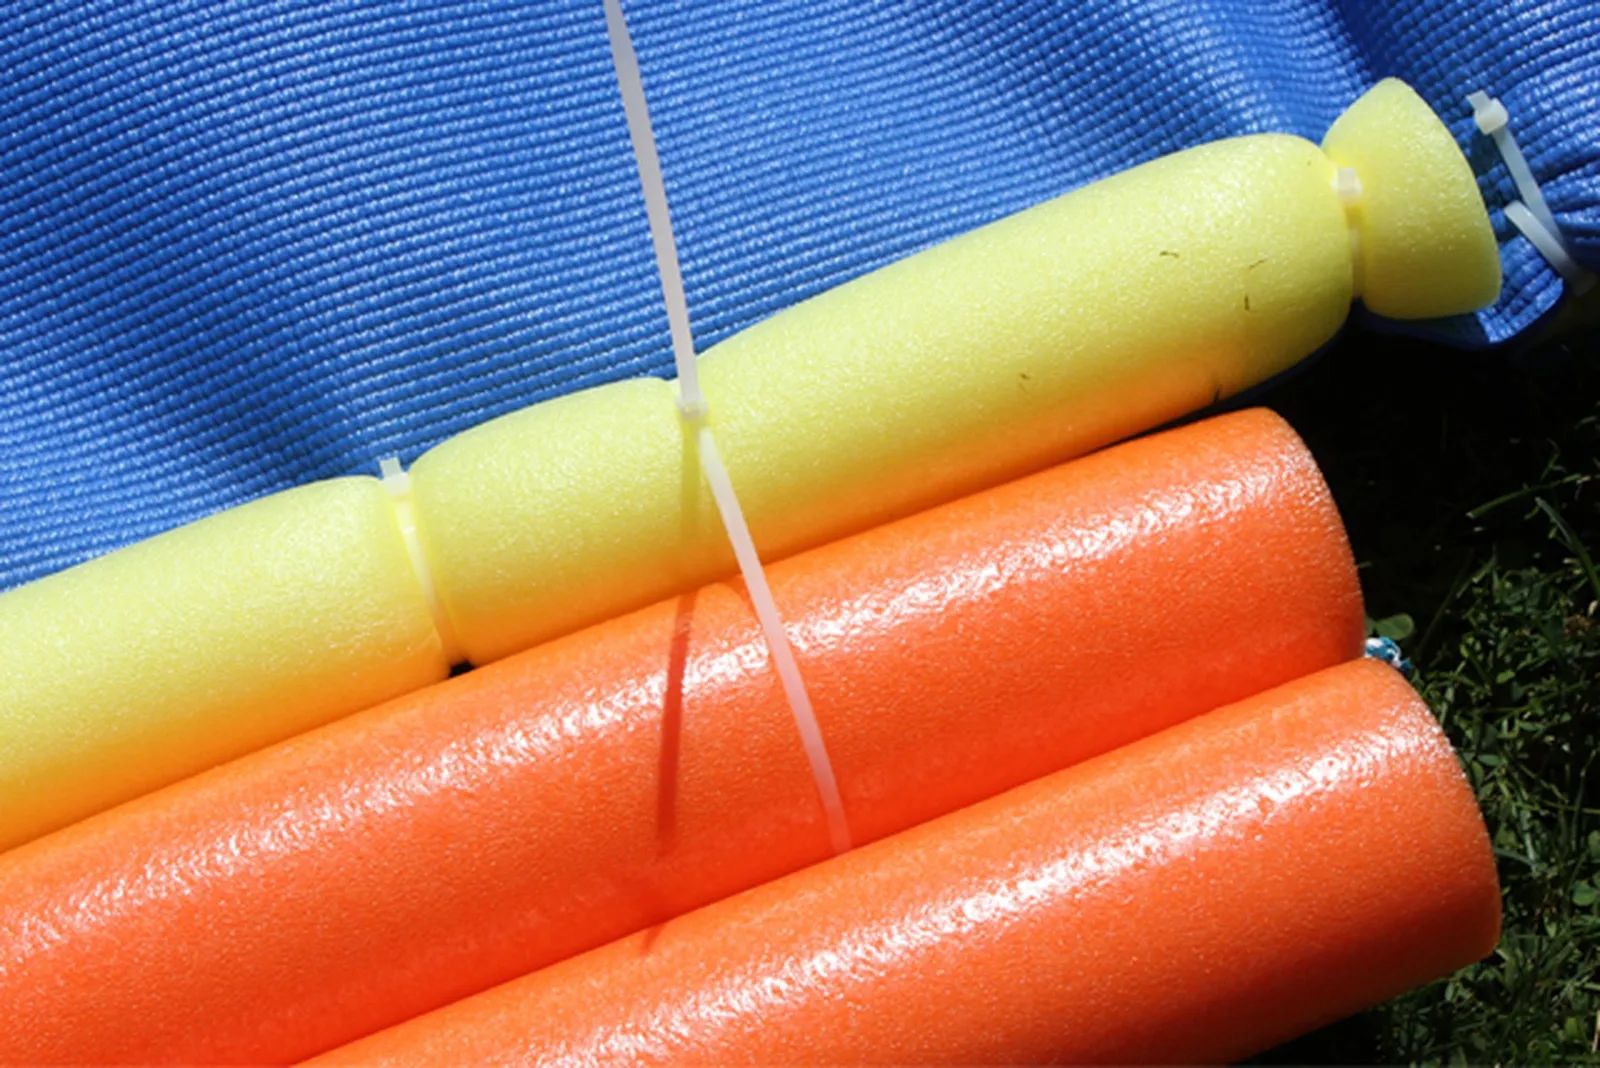
Put the lounger in the water with the noodles underneath, and remember to place your drink in the cup holder. The chair won't keep you completely dry, but it does a great job of keeping you afloat while you relax on the water.